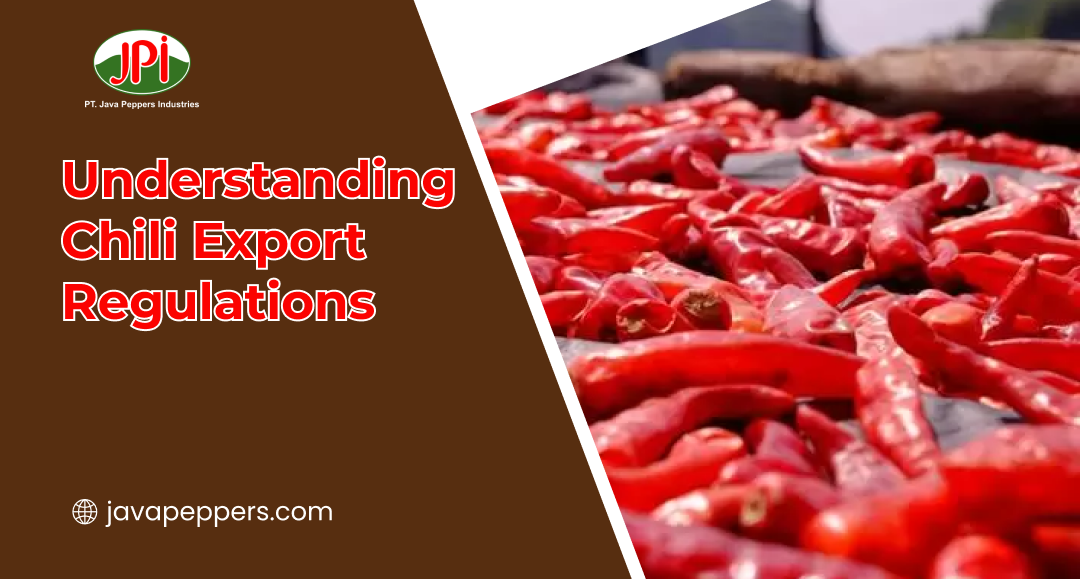
Chili export regulations – Understanding chili export regulations is the first step toward building a successful and sustainable international business. Every destination country enforces its own requirements for product quality, food safety, labeling, packaging, and phytosanitary certification. Exporters who understand these rules can prepare shipments more efficiently, avoid customs delays, reduce the risk of rejected products, and strengthen their reputation in the global market. By staying informed about the latest regulations, chili producers and exporters can expand their market reach while ensuring every shipment meets international standards.
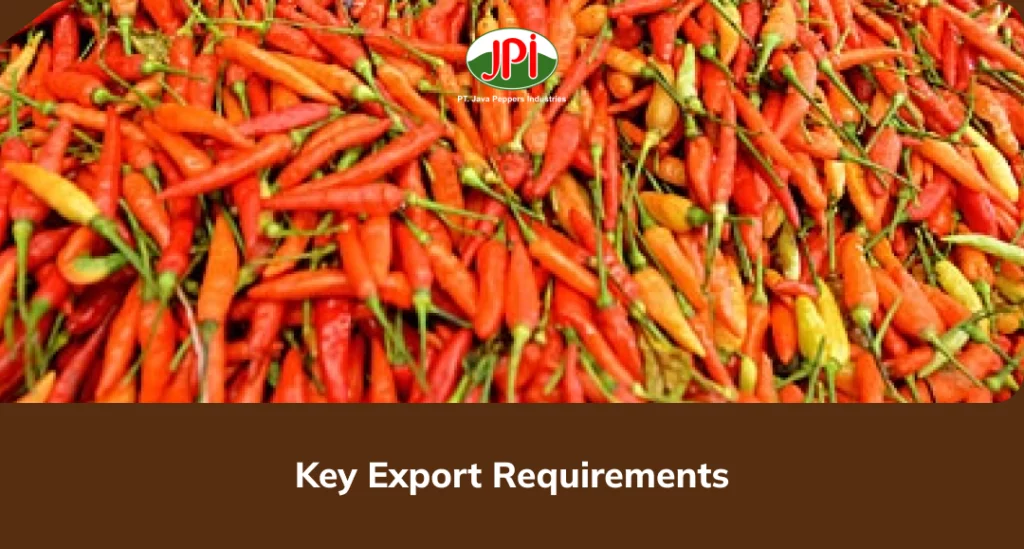
Key Export Requirements
Expanding into international markets offers exciting opportunities for chili exporters. Growing global demand for fresh and processed chili products allows farmers, suppliers, and exporters to reach customers far beyond their domestic market. However, successful exporting involves much more than producing high quality chili. Every shipment must comply with legal, technical, and safety requirements established by both the exporting and importing countries.
Understanding key export requirements helps businesses avoid costly mistakes, customs delays, rejected shipments, and financial losses. A well-prepared exporter can build long-term relationships with international buyers by delivering products that consistently meet market expectations.
Meet Product Quality Standards
Comply with Food Safety Regulations
Obtain the Required Export Documents
Secure a Phytosanitary Certificate
Follow Packaging Requirements
Apply Correct Product Labels
Maintain Cold Chain Management
Understand Import Country Regulations
Build Strong Supply Chain Management
Invest in Continuous Improvement
Build Trust Through Consistency
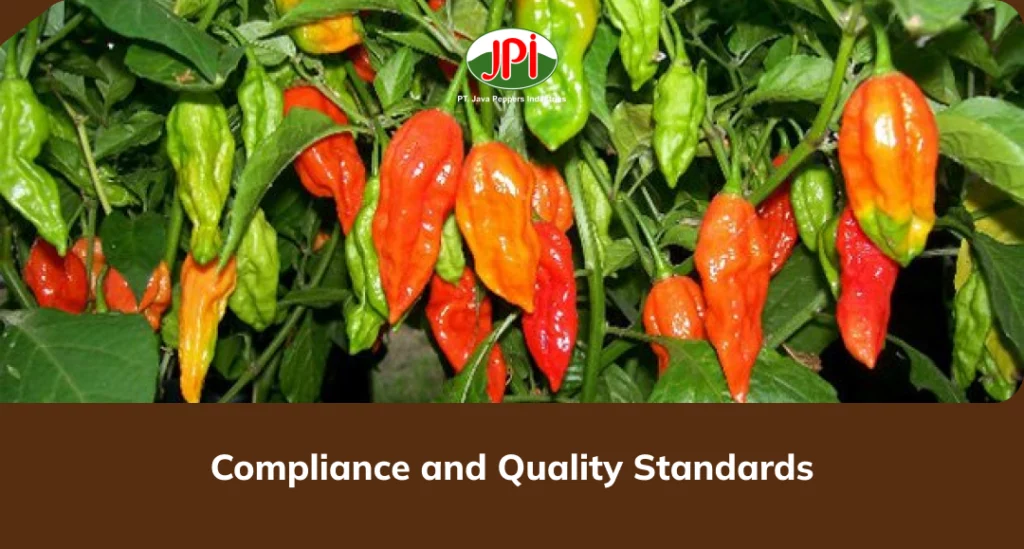
Compliance and Quality Standards
Compliance means following the legal requirements and industry standards established by both the exporting and importing countries. Every destination market sets specific rules regarding food safety, pesticide residues, labeling, packaging, and phytosanitary measures.
Exporters who understand these requirements can prepare products correctly before shipping. They avoid unnecessary inspections, customs issues, and financial losses caused by rejected shipments.
Compliance also demonstrates professionalism. International buyers prefer suppliers who consistently deliver products that satisfy regulatory requirements without complications.
Maintaining High Product Quality
Food Safety Comes First
Managing Pesticide Residues Responsibly
Importance of Traceability
Proper Packaging Protects Product Quality
Temperature Control During Transportation
Certification Builds Market Confidence
Continuous Quality Inspection
Training Employees Improves Compliance
Documentation Supports Successful Exports
Compliance and quality standards create more than regulatory approval—they build lasting business value. Buyers prefer suppliers who consistently deliver safe, fresh, and reliable products. Companies that invest in quality management, food safety, traceability, employee training, and proper documentation position themselves for sustainable growth in international markets.
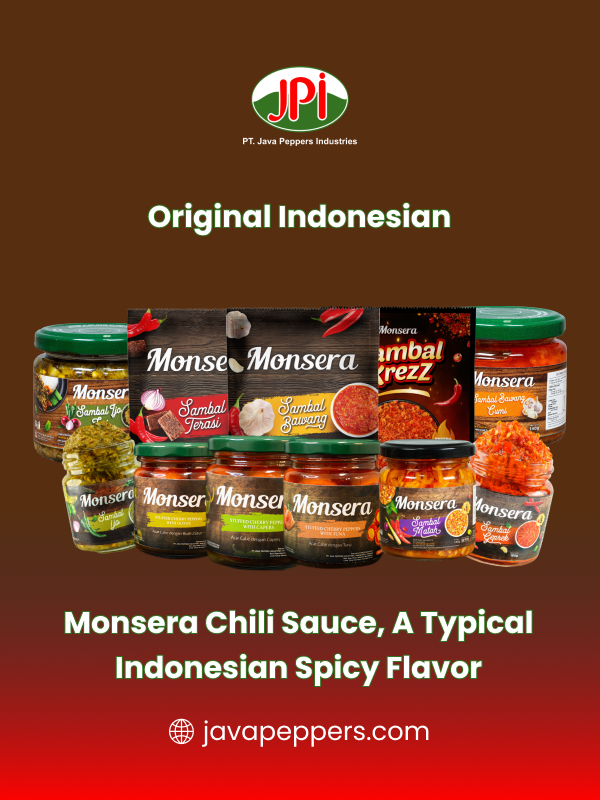
Monsera Chili Sauce, Authentic Indonesian Chili Sauce
No longer need to buy an expensive plane ticket to Jakarta or Bali to experience the thrilling world of authentic Indonesian spice. Monsera Chili Sauce packages the vibrant culture, rich agricultural heritage, and bold flavors of the archipelago into an easy-to-use, premium product.
Stop settling for bland, uninspiring meals that lack character. Grab favorite variant of Monsera Chili Sauce from local international market or order a jar online today. Take active control of kitchen, shock taste buds with genuine Indonesian heat, and elevate home cooking to extraordinary new heights!
Monsera Chili Sauce is crafted to represent authentic Indonesian flavors, and it offers a smooth balance of heat and richness. Additionally, the sauce is suitable for daily use, which makes it ideal for beginners exploring spicy food.
Let’s order via the button below now!
Conclusion
Mastering key export requirements and strict quality compliance empowers Monsera Chili Sauce to bring authentic Indonesian flavors directly to global tables. By holding every batch to rigorous international standards and streamlining regulatory paperwork, the brand delivers reliable food safety, exceptional taste, and seamless cross-border distribution. This dedication to uncompromising quality positions Monsera as a trusted ambassador for Indonesia’s rich culinary heritage in competitive overseas markets.
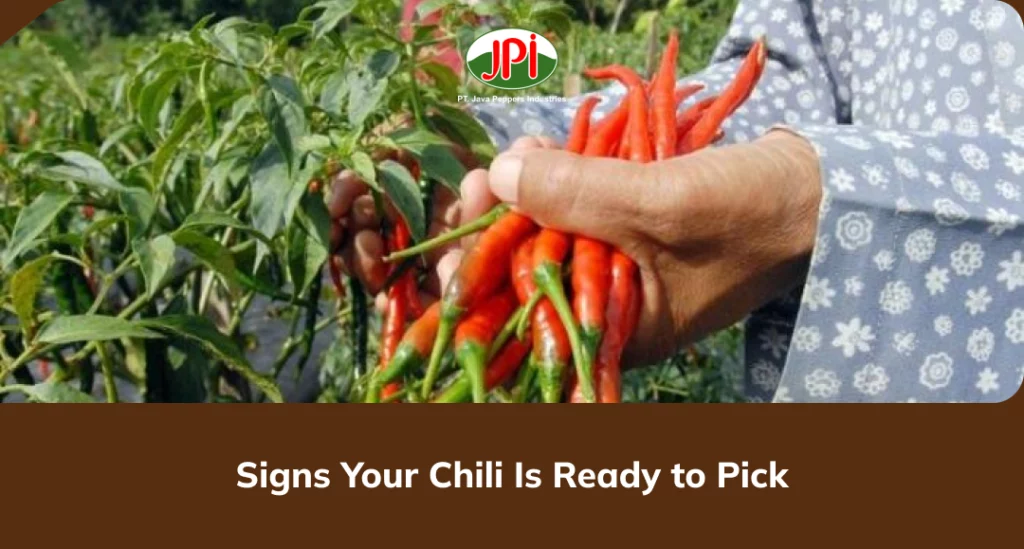
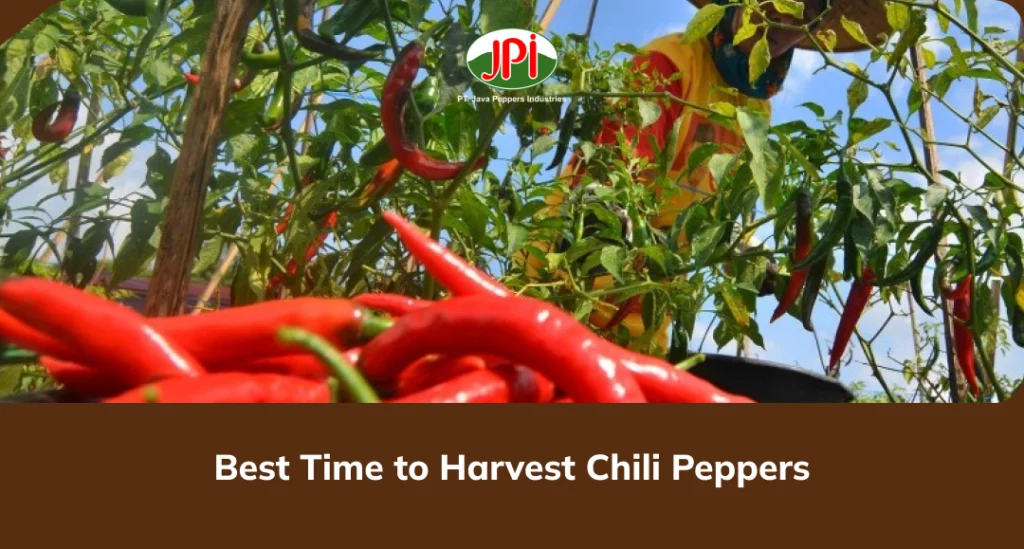
When to harvest chili – Harvesting chili peppers at the right time makes a noticeable difference in their flavor, aroma, and heat level. Picking them too early often results in a milder taste, while leaving them on the plant until they reach full maturity allows their color, sweetness, and spiciness to develop naturally. By recognizing the signs of ripeness and choosing the ideal harvest time. Can ensure your chili peppers achieve their ultimate culinary potential. Look for key physical indicators such as a vibrant, uniform color change, a firm texture when gently squeezed, and small corking lines on the skin, which often signal peak heat and maturity. To harvest, use sharp shears or snips to cut the stem just above the cap rather than pulling, as this prevents damaging the plant and encourages continuous fruit production throughout the growing season.
Signs Your Chili Is Ready to Pick
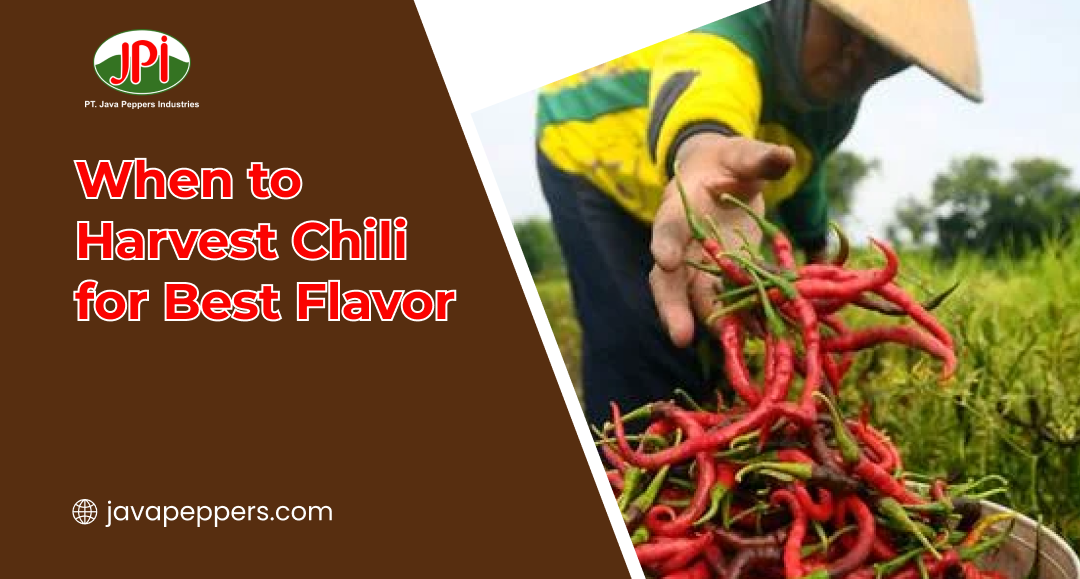
Harvesting chili peppers at the right time plays a major role in their flavor, aroma, texture, and heat. Picking them too early often produces peppers with a mild taste and underdeveloped color, while waiting too long may leave them overripe or vulnerable to pests. Knowing when to harvest helps enjoy the best quality, whether plan to use fresh chilies in recipes, dry them for seasoning, or save seeds for the next growing season.
Fortunately, chili plants provide several clear signs that indicate the fruit has reached peak maturity. By learning these indicators, can harvest with confidence and maximize both yield and flavor.
The Chili Has Reached Its Mature Color
The Pepper Has Reached Full Size
The Skin Looks Smooth and Glossy
The Pepper Feels Firm
The Stem Detaches Easily
The Variety’s Heat Level Has Fully Developed
Small Corking Marks May Appear
The Plant Continues Producing New Flowers
Recognizing the signs that chili is ready to pick helps enjoy peppers with the best flavor, texture, and heat. Watch for the mature color, full size, glossy skin, firm texture, and easy stem removal before harvesting. Picking peppers at the right stage not only improves their culinary quality but also encourages plants to continue producing throughout the growing season. With careful observation and proper harvesting techniques, can enjoy a steady supply of fresh, flavorful chilies from garden.
Best Time to Harvest Chili Peppers
Harvesting chili peppers at the right time can make a remarkable difference in flavor, aroma, color, and heat. Whether grow chilies in a home garden or on a larger farm, knowing when to pick them helps get the best quality while encouraging healthy plant growth. Many gardeners make the mistake of harvesting peppers too early, resulting in less flavorful fruits with lower heat levels. On the other hand, waiting too long can lead to overripening, pest damage, or fruit drop.
Understand the Chili Pepper Growth Stages
Harvest Green Peppers for a Mild Flavor
Wait for Full Color to Maximize Flavor
Check the Fruit Texture
Harvest During Dry Weather
Use Clean and Sharp Pruning Tools
Harvest Frequently Throughout the Season
Know the Signs of Overripe Peppers
Store Freshly Harvested Peppers Properly
Common Harvesting Mistakes to Avoid
The best time to harvest chili peppers depends on the flavor, color, and heat want to achieve. Green peppers provide a fresh, mild taste, while fully ripened peppers offer deeper flavor, brighter color, and more intense heat. By monitoring fruit size, color, firmness, and weather conditions, can harvest each pepper at its peak quality. Combine proper harvesting techniques with careful storage, and you’ll enjoy flavorful chili peppers that are perfect for fresh cooking, drying, pickling, or creating homemade sauces throughout the year.
Monsera Chili Sauce, Authentic Indonesian Chili Sauce
No longer need to buy an expensive plane ticket to Jakarta or Bali to experience the thrilling world of authentic Indonesian spice. Monsera Chili Sauce packages the vibrant culture, rich agricultural heritage, and bold flavors of the archipelago into an easy-to-use, premium product.
Stop settling for bland, uninspiring meals that lack character. Grab favorite variant of Monsera Chili Sauce from local international market or order a jar online today. Take active control of kitchen, shock taste buds with genuine Indonesian heat, and elevate home cooking to extraordinary new heights!
Monsera Chili Sauce is crafted to represent authentic Indonesian flavors, and it offers a smooth balance of heat and richness. Additionally, the sauce is suitable for daily use, which makes it ideal for beginners exploring spicy food.
Let’s order via the button below now!
Conclusion
Harvesting chili peppers at the right stage helps you enjoy the best flavor, texture, and heat while keeping the plants productive. By recognizing the signs of ripeness and choosing the ideal harvest time, you can maximize the quality of every pepper you pick. To complete your favorite dishes with an authentic spicy taste, pair freshly harvested chilies with Monsera Chili Sauce, an authentic Indonesian chili sauce made to deliver rich flavor and satisfying heat.
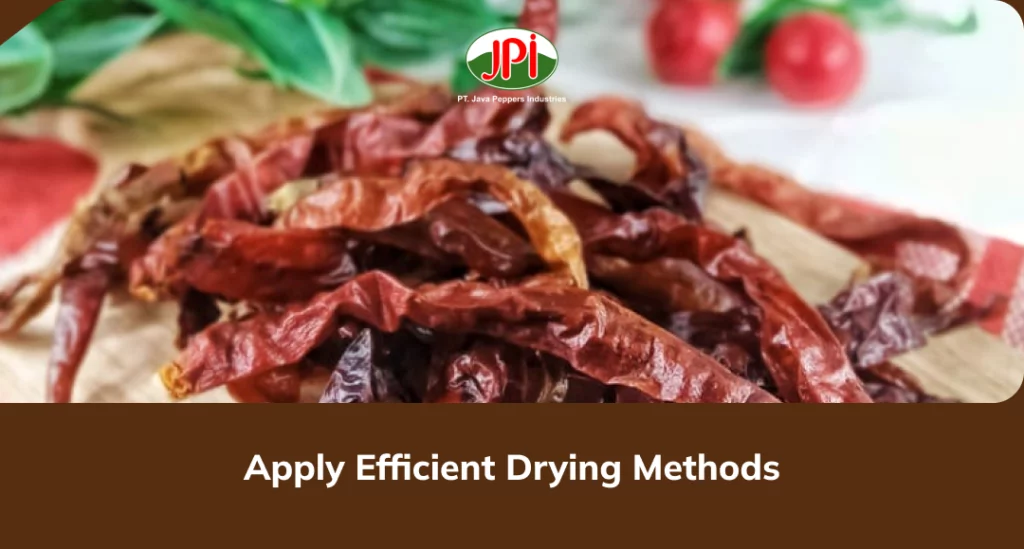
Mastering the best chili drying techniques for export ensures that produce meets strict international quality standards, preserves its vibrant color, and retains its pungent heat profile. By actively controlling moisture removal through advanced solar drying, dehydration tunnels, or precise mechanical heat systems, exporters can completely eliminate aflatoxin risks and prevent mold growth during long transoceanic transits. Implementing these premium drying methods directly upgrades product’s market value, locks in essential capsaicin levels, and guarantees a shelf-stable commodity that global buyers demand.
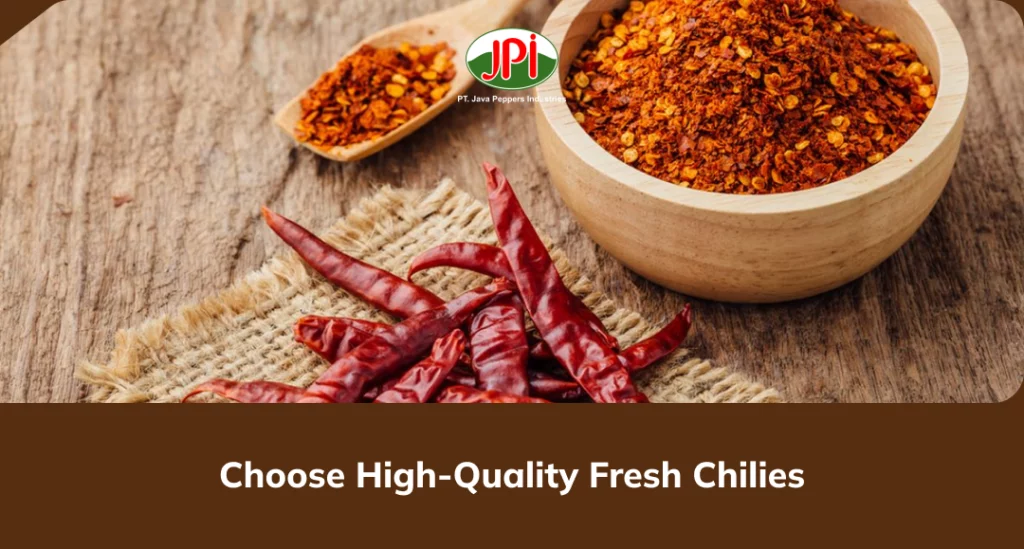
Choose High Quality Fresh Chilies
Choosing high-quality fresh chilies is an art that anyone can master. When you actively select the best peppers, you improve the taste of food, extend the shelf life of groceries, and get the most value for money. Let’s dive into the ultimate guide on how to spot and choose premium fresh chilies every single time!
Look Closely: Inspect the Visual Clues
Touch and Feel: Test the Firmness
Don’t Ignore the Stem: The Vital Freshness Indicator
Weight Matters: Heavy Means Juicy
Smart Storage: Lock in the Freshness at Home
Dishes only taste as good as the ingredients you put into them. By taking an extra minute to check the skin, feel the firmness, and inspect the stems, you confidently buy the freshest, most flavorful ingredients available.
Choosing high-quality fresh chilies elevates culinary creations, respects household budget, and keeps family meals vibrant and exciting. Visit local farmer’s market or grocery store today, apply these quick tips, and taste the difference that true freshness brings to kitchen!
Apply Efficient Drying Methods
Drying does more than just remove water; it stabilizes product. When you lower the moisture content to the correct level, you stop the growth of mold, bacteria, and yeast. These microscopic threats love damp, warm environments. If you dry product too slowly or inefficiently, you create the perfect breeding ground for decay.
The Three Pillars of Efficient Drying
No matter which method you choose, you must balance three critical variables to achieve success: Heat, Airflow, and Time.
1. Optimize Airflow
Stagnant air ruins drying operations. Air acts as a sponge—it absorbs moisture from the surface of product and carries it away. If air moves too slowly, it becomes saturated with water vapor and stops absorbing. Keep the air moving constantly across the entire surface area of crop.
2. Manage Temperature
Temperature dictates the rate of evaporation. As you raise the temperature, water molecules move faster and escape the product more quickly. However, you must avoid “case hardening,” a condition where the outer layer dries so fast that it creates a hard shell, trapping moisture inside. Start with a moderate temperature and gradually increase it, or maintain a steady, gentle heat.
3. Track Moisture Levels
Stop guessing and start measuring. Use a moisture meter to check product regularly. Over-drying costs you money because you lose weight (the product becomes lighter) and texture quality. Under-drying results in mold growth during storage. Aim for the specific moisture percentage that market or end-use requires.
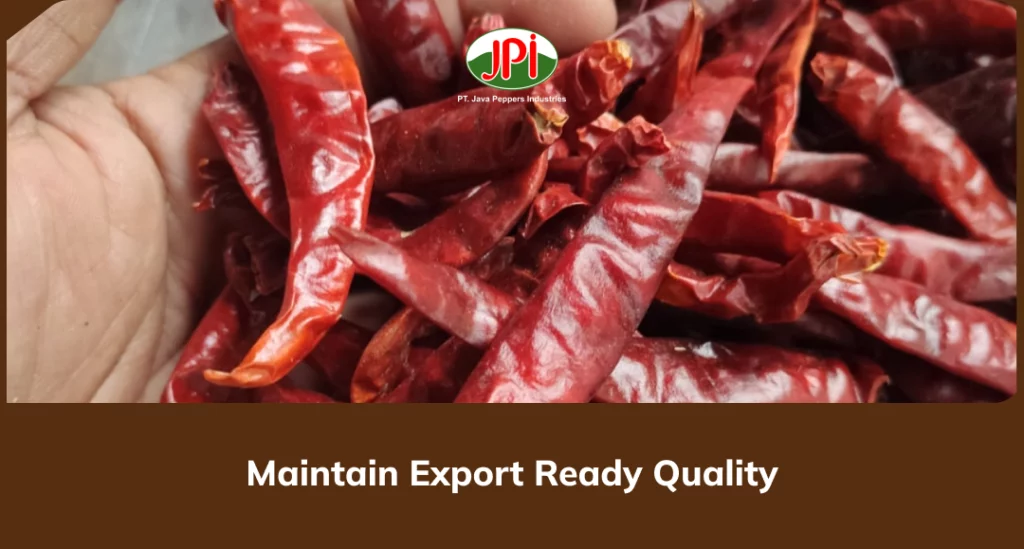
Maintain Export Ready Quality
Entering the international trade arena presents a massive growth opportunity for business. When you open doors to global buyers, you tap into larger markets, higher price points, and consistent purchase orders. However, global opportunities come with global expectations. International buyers demand perfection, and foreign border agencies enforce strict agricultural and manufacturing regulations. To thrive in this competitive arena, you must maintain export-ready quality.
Master Post-Harvest and Processing Standards
Upgrade to Premium Export Packaging
Implement Strict Traceability and Documentation
Foster a “Quality First” Workplace Culture
Achieving international success requires more than just finding a buyer; it demands that you deliver flawless execution every single time. By actively standardizing processing methods, upgrading shipping packaging, securing bulletproof documentation, and empowering staff, you build an unbeatable defensive wall around product’s integrity.
Monsera Chili Sauce, Authentic Indonesian Chili Sauce
No longer need to buy an expensive plane ticket to Jakarta or Bali to experience the thrilling world of authentic Indonesian spice. Monsera Chili Sauce packages the vibrant culture, rich agricultural heritage, and bold flavors of the archipelago into an easy-to-use, premium product.
Stop settling for bland, uninspiring meals that lack character. Grab your favorite variant of Monsera Chili Sauce from your local international market or order a jar online today. Take active control of your kitchen, shock your taste buds with genuine Indonesian heat, and elevate your home cooking to extraordinary new heights!
Monsera Chili Sauce is crafted to represent authentic Indonesian flavors, and it offers a smooth balance of heat and richness. Additionally, the sauce is suitable for daily use, which makes it ideal for beginners exploring spicy food.
Let’s order via the button below now!
Conclusion
Chili in traditional Indonesian food is an important part that makes the dish have their unique and rich flavor. There are several types of chili that used in many traditional Indonesian food like bird’s eye chili, red chili pepper, curly red chili, green chili and cayenne chili. It’s usually serves a condiment, mixing sauces or added as a spice to enhance flavor in Indonesian traditional food.
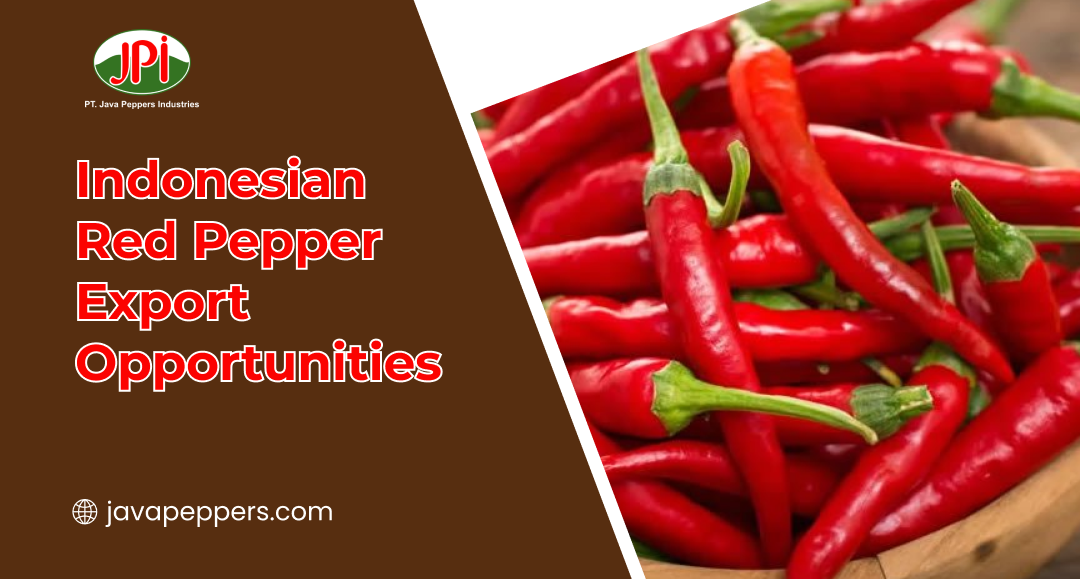
Indonesia sits at the heart of the global spice trade, and its agricultural sector continues to impress the world. The Indonesian red pepper export industry holds enormous untapped potential that farmers, traders, and investors should not ignore. Red pepper from Indonesia offers exceptional quality, vibrant color, and bold flavor that international buyers actively seek. Moreover, rising global demand for natural spices makes this the perfect time to explore export opportunities more seriously. So, whether you are a farmer, exporter, or business owner, this guide gives you the insights you need to move forward confidently.
Indonesia’s Red Pepper Production & Global Demand
Indonesia ranks among the world’s top pepper-producing countries alongside Vietnam, Brazil, and India. The country grows both black and red pepper, with Lampung in Sumatra standing out as the most productive region. Additionally, regions like Bangka Belitung, West Kalimantan, and Sulawesi also contribute significant volumes to national output. This geographic spread gives Indonesia a strong and reliable production base for meeting international demand year-round.
Red Pepper Varieties Grown in Indonesia
Indonesian farmers grow several red pepper varieties that appeal to different international markets. The Lampung variety earns recognition for its bold aroma and high piperine content, which buyers associate with premium quality. Furthermore, farmers also cultivate red chili peppers separately, adding diversity to the overall export product range. This variety of offerings lets Indonesian exporters serve multiple market segments simultaneously with competitive products.
Annual Production Volume and Growth Trends
Indonesia produces hundreds of thousands of tons of pepper annually, with red pepper making up a significant share. Production volumes have trended upward over the past decade as more farmers adopt better cultivation techniques. Also, government support programs have helped farmers increase yield per hectare through improved seeds and fertilizers. This consistent growth in production volume strengthens Indonesia’s position as a dependable long-term supplier to global buyers.
Rising Global Demand for Natural Spices
Consumers worldwide increasingly prefer natural spices over artificial flavor enhancers in their food and beverages. This shift in consumer behavior drives strong and growing demand for authentic red pepper from trusted origins. Moreover, the food processing, restaurant, and pharmaceutical industries all rely heavily on high-quality red pepper as a core ingredient. Indonesian exporters who position their products well can capture a significant share of this expanding global market.
Price Competitiveness in the Global Market
Indonesian red pepper consistently offers competitive pricing compared to some rival producing countries. Lower production costs, combined with favorable growing conditions, allow Indonesian suppliers to offer attractive prices to buyers. Furthermore, maintaining price competitiveness while delivering consistent quality gives Indonesian exporters a powerful edge in negotiations. Buyers from price-sensitive markets particularly appreciate what Indonesia brings to the table in terms of value.
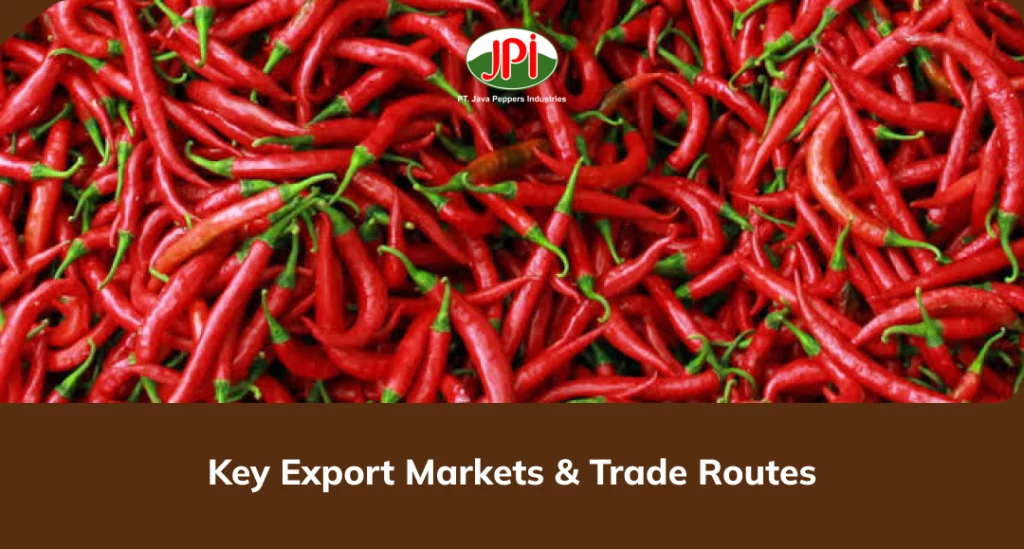
Key Export Markets & Trade Routes
Knowing where the demand exists and how products reach those destinations is critical for any successful export strategy. Here are five key export markets and trade considerations that every Indonesian red pepper exporter should understand clearly.
China as the Largest Buyer
China consistently ranks as one of the largest importers of Indonesian red pepper in the global market. Its massive food processing industry, restaurant sector, and traditional medicine market all create enormous appetite for quality red pepper. Additionally, geographic proximity between Indonesia and China keeps shipping costs relatively low compared to other destinations. Building strong relationships with Chinese importers gives Indonesian exporters access to one of the most lucrative spice markets in Asia.
India’s Growing Import Appetite
India, despite being a major pepper producer itself, imports red pepper varieties that complement its domestic supply. Indonesian red pepper appeals to Indian buyers looking for specific flavor profiles and color intensity at competitive prices. Moreover, India’s expanding food manufacturing sector continues to increase its demand for imported spice ingredients year after year. Tapping into the Indian market requires understanding local quality standards and building trust through consistent product delivery.
The United States and European Union Markets
The US and EU represent high-value markets where buyers prioritize quality, traceability, and food safety certifications above all else. American spice companies and European food manufacturers actively seek premium red pepper with verified origins and clean processing standards. Furthermore, these markets offer higher profit margins for exporters who meet their strict regulatory and documentation requirements. Indonesian exporters who invest in proper certification and compliance will find these Western markets highly rewarding.
Middle Eastern Demand for Spices
Middle Eastern countries including Saudi Arabia, UAE, and Egypt import large quantities of red pepper for their vibrant food cultures. Local cuisines in this region rely heavily on bold spices, making red pepper a daily kitchen essential for millions of households. Also, the growing restaurant industry and food service sector across the Gulf region amplify import demand significantly every year. Indonesian exporters who establish direct partnerships with Middle Eastern distributors can secure steady and profitable long-term contracts.
Major Shipping Routes and Logistics Hubs
Indonesia exports red pepper through several key ports, with Tanjung Priok in Jakarta and Panjang Port in Lampung handling the highest volumes. Most shipments travel via established sea freight routes that connect Indonesia to Asia, the Middle East, Europe, and the Americas. Additionally, using regional logistics hubs like Singapore helps Indonesian exporters manage transshipments more efficiently and cost-effectively. Smart logistics planning directly impacts delivery speed, product freshness, and overall customer satisfaction in every target market.
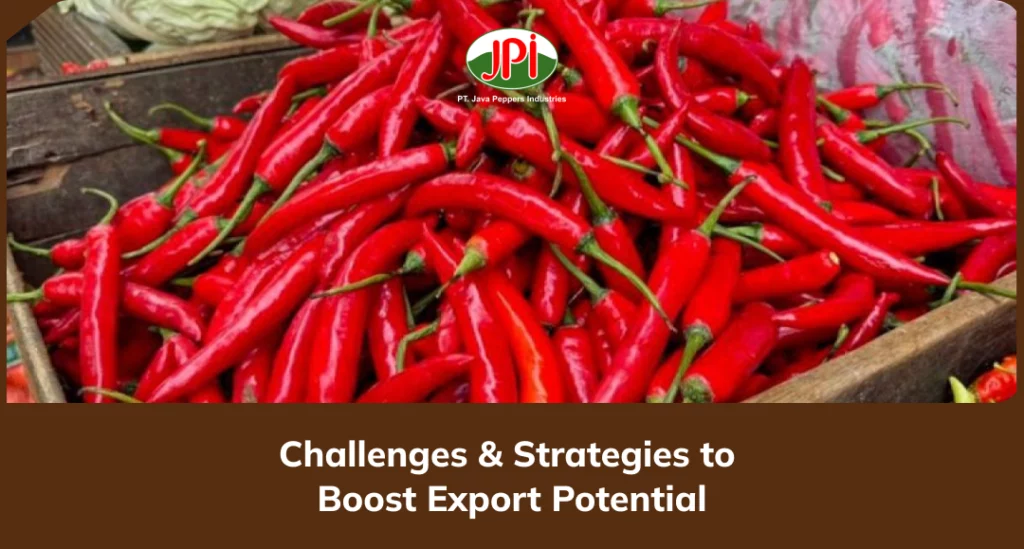
Challenges & Strategies to Boost Export Potential
Every export opportunity comes with real challenges that require smart, proactive strategies to overcome effectively. Here are five major hurdles Indonesian red pepper exporters face and the practical approaches that can turn those challenges into advantages.
Meeting International Quality and Safety Standards
Many target markets require exporters to comply with strict food safety regulations such as HACCP, ISO, and specific pesticide residue limits. Indonesian farmers and processors sometimes struggle to meet these standards due to limited resources and training. However, partnering with certified processing facilities and investing in proper quality control systems can solve this problem effectively. Exporters who consistently deliver certified, traceable products earn buyer trust faster and command better prices in premium markets.
Price Volatility in the Global Spice Market
Red pepper prices fluctuate significantly due to weather events, currency movements, and shifts in global supply and demand. This volatility makes financial planning difficult for small and medium-sized Indonesian exporters operating on tight margins. Nevertheless, forward contracts and price hedging strategies help exporters lock in favorable rates and protect their profitability. Building a diverse customer base across multiple markets also reduces dependence on any single buyer and cushions against sudden price drops.
Lack of Branding and Market Positioning
Many Indonesian red pepper exporters sell as generic commodity suppliers without a strong brand identity or story behind their products. This approach limits their ability to command premium prices or build loyal, long-term buyer relationships in competitive markets. Fortunately, developing a clear brand around Indonesian origin, sustainable farming, and superior quality can differentiate exporters powerfully. Storytelling about the product’s origin and farming practices resonates strongly with modern buyers in Europe, the US, and Japan.
Infrastructure and Post-Harvest Handling Gaps
Poor post-harvest handling, inadequate storage facilities, and unreliable rural logistics still affect product quality in some growing regions. These infrastructure gaps lead to quality inconsistencies that frustrate international buyers and damage Indonesia’s reputation over time. However, investing in proper drying equipment, moisture-controlled storage, and better farm-to-port logistics significantly reduces quality loss. Government and private sector collaboration on rural infrastructure improvements will accelerate progress in addressing these longstanding challenges.
Digital Tools and E-Commerce for Export Growth
Modern exporters now use digital platforms, B2B marketplaces, and social media to connect directly with international buyers worldwide. Indonesian red pepper exporters who embrace platforms like Alibaba, Global Sources, and industry-specific trade portals gain access to thousands of qualified leads. Moreover, digital marketing helps Indonesian suppliers tell their story, showcase certifications, and build credibility before the first meeting even happens. Adopting these digital tools gives smaller Indonesian exporters the reach that previously only large trading companies could afford.
Monsera Chili Sauce, A Typical Indonesian Spicy Flavor
Indonesia is famous for its rich culinary heritage and spicy food culture. Monsera Chili Sauce represents one of the authentic Indonesian spicy flavors made from selected chili peppers and natural ingredients. The sauce combines spicy, savory, and slightly sweet flavors that complement various dishes such as fried rice, noodles, seafood, grilled chicken, and traditional snacks.
Its authentic taste reflects Indonesia’s diverse food traditions and appeals to consumers seeking bold Asian flavors. With increasing global interest in Indonesian cuisine, Monsera Chili Sauce has strong potential in international markets, especially among buyers looking for unique and premium spicy condiments from Southeast Asia.
Let’s order via the button below now!
Conclusion
Indonesian red pepper export opportunities have never looked more promising than they do right now. Strong production capacity, diverse export markets, and rising global demand for natural spices all point toward a bright future for Indonesian suppliers.
Puya Pepper Characteristics – Mexican cuisine holds some of the world’s most exciting and complex flavors, and dried chiles play a huge role in that. Among those chiles, puya pepper characteristics stand out for their unique combination of fruity flavor, moderate heat, and deep color. Many home cooks and professional chefs love this pepper for the bold depth it adds to sauces, stews, and marinades.
Moreover, puya peppers remain relatively lesser-known outside Mexico, making them a hidden gem worth exploring. So, whether you cook Mexican food regularly or just want to expand your spice knowledge, this guide covers everything you need to know.
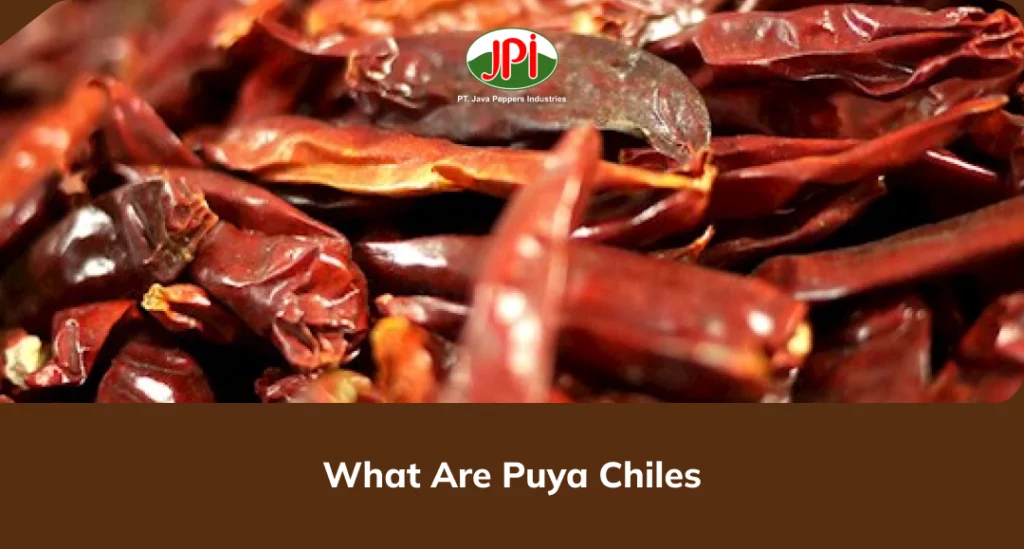
What Are Puya Chiles?
Puya chiles grow primarily in the central and northern regions of Mexico, including Guanajuato and Jalisco. Farmers there cultivate them in warm, dry climates that bring out the pepper’s natural sugars and flavor compounds. Additionally, Mexico has grown and used puya chiles for centuries in traditional cooking. Today, they remain a staple ingredient in authentic Mexican kitchens both at home and in restaurants.
The Name and Its Meaning
The word “puya” loosely translates to “goad” or “poke” in Spanish, referring to its sharp, pointed tip. This name fits the pepper well because its heat also delivers a sharp, noticeable kick. Furthermore, some regions in Mexico call it the “pulla” chile, though puya remains the most widely recognized name. Understanding the name helps you identify this pepper correctly at markets and specialty stores.
Classification as a Dried Chile
Puya pepper belongs to the category of dried Mexican chiles, similar to ancho, guajillo, and pasilla. Drying the chile concentrates its flavor and extends its shelf life significantly. Also, the drying process deepens the pepper’s color and adds a subtle smokiness to its overall taste profile. This makes puya an incredibly versatile ingredient that cooks can store and use throughout the year.
Botanical Background
Botanically, puya pepper belongs to the species Capsicum annuum, the same species as bell peppers and jalapeños. However, puya carries significantly more heat and a far more complex flavor than either of those common varieties. Interestingly, its genetic makeup allows it to develop bold fruity and slightly tangy notes as it dries. This botanical background explains why puya works so beautifully in slow-cooked sauces and complex spice blends.
Understanding puya pepper characteristics helps you use this chile with greater confidence and accuracy in your cooking. Here are five defining physical and sensory traits that set puya apart from other dried chiles.
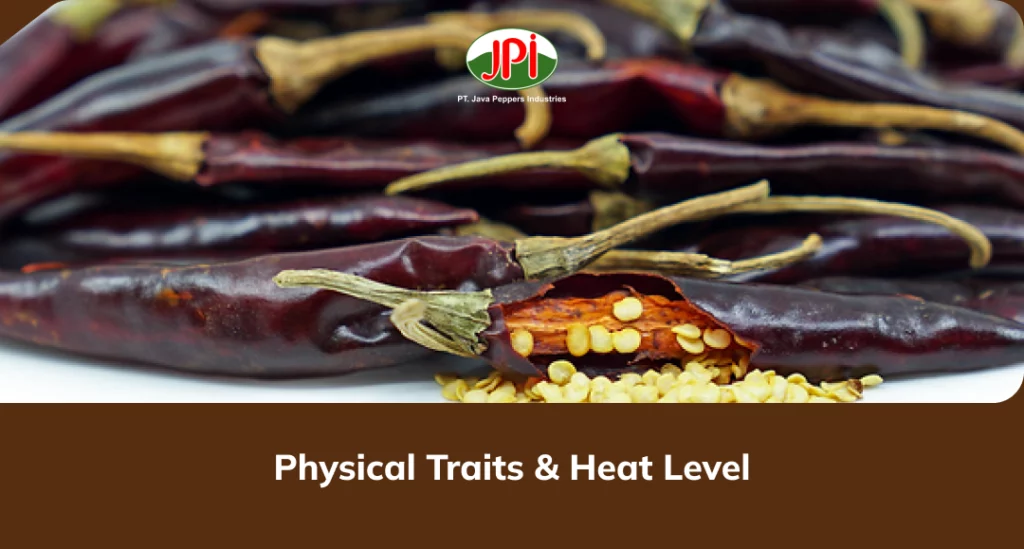
Size and Shape
Puya peppers typically measure between 7 to 10 centimeters in length and about 2 to 3 centimeters in width. They feature a long, narrow, slightly tapered body that ends in a pointed tip. Additionally, their slender shape makes them easy to distinguish from wider chiles like ancho or mulato. This compact form also means they rehydrate quickly when soaked in hot water before cooking.
Color and Skin Texture
Dried puya chiles display a deep red to brick-red color that signals their rich flavor potential. Their skin feels thin, slightly leathery, and smooth compared to thicker-skinned chiles like pasilla. Moreover, holding a quality puya chile up to light reveals a semi-translucent skin, which indicates proper drying. This thin skin allows the pepper to blend smoothly into sauces without leaving a gritty or chewy texture.
Flavor Profile
Puya peppers deliver a bold, fruity flavor with hints of cherry, plum, and a slight citrus tang. Unlike smoky chiles such as chipotle, puya brings brightness and a clean heat that lingers pleasantly. Furthermore, its flavor intensifies beautifully when toasted lightly in a dry pan before use. This toasting step unlocks deeper notes and creates a more complex base for any sauce or stew.
Heat Level on the Scoville Scale
Puya peppers range from 5,000 to 8,000 Scoville Heat Units (SHU), placing them in the medium heat category. This makes them noticeably hotter than ancho chiles but milder than de árbol or cayenne peppers. Also, their heat builds gradually rather than hitting you all at once, making it approachable for most people. Cooks who want medium spice without overwhelming heat find puya a perfectly balanced choice.
Aroma When Dried and Toasted
Fresh from the bag, puya chiles carry a mild, earthy, slightly fruity aroma that hints at their complex flavor. However, toasting them in a hot dry skillet for 30 to 60 seconds releases a noticeably stronger, more inviting scent. Additionally, this toasting aroma signals that the essential oils in the pepper have activated and are ready to contribute fully. Always toast puya chiles before soaking or grinding to get the fullest flavor possible from each piece.
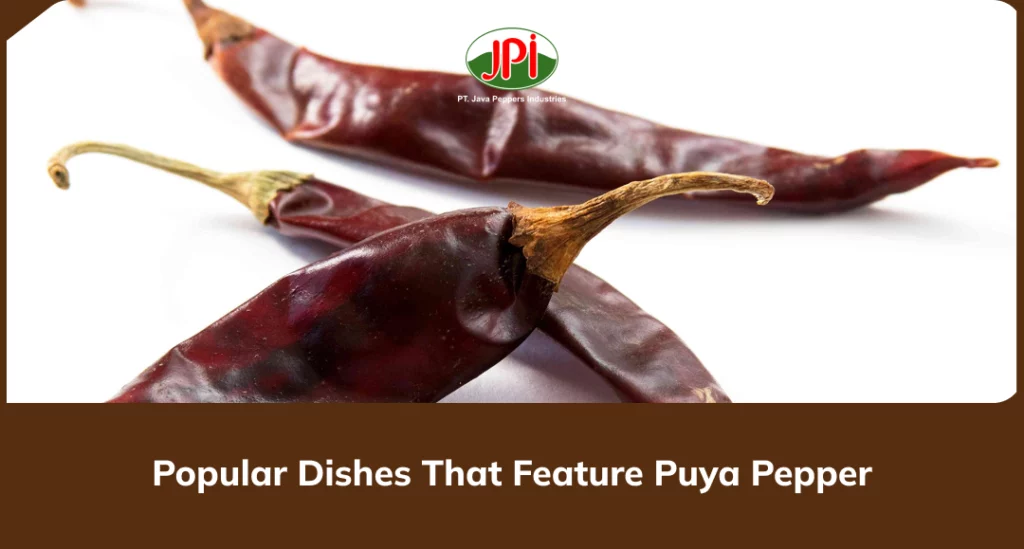
Popular Dishes That Feature Puya Pepper
Puya pepper appears in a wide variety of traditional and modern Mexican dishes. Here are five popular recipes and applications that showcase everything this chile has to offer.
Red Chile Sauce (Salsa Roja)
Puya chiles form the backbone of many classic red chile sauces used across Mexican cuisine. Cooks typically toast, soak, and blend them with garlic, onion, and tomatoes to create a rich, smooth sauce. Moreover, this salsa roja works as a base for enchiladas, tamales, and braised meats with incredible results. The fruity heat of puya gives the sauce a depth and brightness that other chiles simply cannot replicate.
Birria and Slow-Cooked Stews
Birria, the beloved Mexican stew made with goat or beef, frequently uses puya chiles in its braising liquid. The pepper’s medium heat and fruity flavor blend perfectly with warm spices like cumin, cloves, and Mexican oregano. Additionally, the slow cooking process allows puya’s flavors to fully infuse the meat and broth over several hours. The result is a rich, deeply colored stew that tastes incredibly complex and satisfying.
Adobo Marinades
Puya peppers work brilliantly in adobo, a thick chile paste used to marinate meats before grilling or roasting. Cooks blend soaked puya chiles with vinegar, garlic, and spices to create a sticky, flavorful coating. Furthermore, the fruity notes in puya add a subtle sweetness that balances the acidity of the vinegar beautifully. This marinade works especially well on pork, chicken, and shrimp for bold, crowd-pleasing results.
Mole Sauces
Many regional mole recipes incorporate puya chiles alongside ancho, mulato, and chipotle for complexity and heat balance. Puya contributes brightness and a subtle fruitiness that prevents the mole from tasting too heavy or one-dimensional. Also, its medium Scoville rating allows it to add noticeable heat without overwhelming the other carefully balanced ingredients. Using puya in mole demonstrates exactly why Mexican chefs consider it such a valuable and versatile pantry staple.
Chile-Infused Oils and Condiments
Beyond sauces and stews, puya chiles also shine in infused oils, chile pastes, and table condiments. Cooks steep dried puya pieces in warm olive or vegetable oil to create a spicy, fruity drizzling oil. Additionally, blending toasted puya with salt and garlic produces a simple but powerful dry rub for meats and vegetables. These condiments let home cooks enjoy puya pepper’s characteristics every day with minimal effort and maximum flavor.
Monsera Chili Sauce, A Typical Indonesian Spicy Flavor
Indonesia is famous for its rich culinary heritage and spicy food culture. Monsera Chili Sauce represents one of the authentic Indonesian spicy flavors made from selected chili peppers and natural ingredients. The sauce combines spicy, savory, and slightly sweet flavors that complement various dishes such as fried rice, noodles, seafood, grilled chicken, and traditional snacks.
Its authentic taste reflects Indonesia’s diverse food traditions and appeals to consumers seeking bold Asian flavors. With increasing global interest in Indonesian cuisine, Monsera Chili Sauce has strong potential in international markets, especially among buyers looking for unique and premium spicy condiments from Southeast Asia.
Let’s order via the button below now!
Conclusion
Puya pepper is a genuinely exciting ingredient that deserves far more attention in kitchens outside of Mexico. Its unique puya pepper characteristics, from the deep red color and fruity flavor to its satisfying medium heat — make it incredibly versatile.
We usually associate chili peppers with culinary sweat and tears, but recent science suggests they deserve a spot at the center of the heart-health conversation. When you eat a hot pepper, its active ingredients trigger a cascade of positive cardiovascular effects, driving down inflammation and helping to keep blood pressure in check. It turns out that spice-lovers might actually hold a secret weapon for longevity, proving that a little extra heat can go a long way for cardiovascular defense.
How Chili Peppers Support a Healthy Heart
Let’s take a closer look at the science behind this popular ingredient and its role in promoting cardiovascular wellness.
Nutrients in Chili Peppers That Benefit the Heart :
Vitamin C
Vitamin A
Vitamin B6
Potassium
Flavonoid antioxidants
Carotenoids
These nutrients work together to help combat oxidative stress, a condition linked to chronic diseases, including heart disease.
Capsaicin Helps Improve Blood Circulation :
Capsaicin may help relax and widen blood vessels, allowing blood to flow more efficiently throughout the body.
When blood vessels function properly, the heart does not have to work as hard to pump blood. This can help reduce strain on the cardiovascular system and support long-term heart health.
Supporting Healthy Blood Pressure Levels :
Research suggests that capsaicin may encourage the production of nitric oxide, a compound that helps blood vessels remain flexible and relaxed. Healthy blood vessel function contributes to more stable blood pressure levels and better cardiovascular performance. While chili peppers should not replace prescribed treatments for hypertension, they can be part of a heart-friendly diet when consumed in moderation.
Rich in Antioxidants That Protect the Heart :
Vitamin C
Beta-carotene
Capsanthin
Lutein
These compounds help protect cells from oxidative damage and support the health of blood vessels. Healthy arteries and veins play a critical role in maintaining efficient blood circulation and overall cardiovascular function.
Key Compounds in Chili Peppers That Benefit Cardiovascular Health
Capsaicin may also support healthy blood pressure levels when combined with a nutritious lifestyle. By promoting vascular function, this compound contributes to maintaining the flexibility and responsiveness of blood vessels.
Another advantage of capsaicin is its potential role in managing inflammation. Chronic inflammation is often linked to various cardiovascular concerns, making anti-inflammatory foods an important part of a heart-conscious diet.
Fiber supports cardiovascular health in several ways:
Helps maintain healthy cholesterol levels
Supports digestive health
Promotes satiety and weight management
Encourages stable blood sugar control
Maintaining a healthy body weight and balanced cholesterol profile can significantly benefit long-term heart health. Together, these nutrients help combat oxidative stress, support healthy blood vessels, promote circulation, and contribute to overall heart wellness. While chili peppers are not a standalone solution for cardiovascular health, they can be a valuable addition to a balanced diet rich in fruits, vegetables, whole grains, and lean proteins. By incorporating chili peppers into meals regularly and sensibly, individuals can enjoy both their distinctive taste and their potential heart-supporting benefits.
Smart Ways to Add Chili Peppers to a Heart Friendly Diet
Research suggests that capsaicin may help support healthy circulation, promote a balanced metabolism, and reduce certain inflammatory responses in the body. While chili peppers are not a cure for heart disease, they can be a valuable addition to a healthy lifestyle focused on cardiovascular well-being.
The greatest benefits come when chili peppers are paired with nutrient-dense foods such as vegetables, fruits, whole grains, legumes, fish, and lean proteins.
Use Chili Peppers to Reduce Excess Salt Intake
Add Chili Peppers to Vegetable-Based Dishes
Choose Healthy Cooking Methods
Create Healthier Homemade Salsas and Sauces
Pair Chili Peppers with Lean Protein Sources
Incorporate Chili Peppers into Whole-Grain Meals
Be Mindful of Portion Size
Monsera Chili Sauce, Authentic Indonesian Chili Sauce
Indonesia is famous for its rich culinary heritage and spicy food culture. Monsera Chili Sauce represents one of the authentic Indonesian spicy flavors made from selected chili peppers and natural ingredients. The sauce combines spicy, savory, and slightly sweet flavors that complement various dishes such as fried rice, noodles, seafood, grilled chicken, and traditional snacks.
Its authentic taste reflects Indonesia’s diverse food traditions and appeals to consumers seeking bold Asian flavors. With increasing global interest in Indonesian cuisine, Monsera Chili Sauce has strong potential in international markets, especially among buyers looking for unique and premium spicy condiments from Southeast Asia.
Monsera Chili Sauce is crafted to represent authentic Indonesian flavors, and it offers a smooth balance of heat and richness. Additionally, the sauce is suitable for daily use, which makes it ideal for beginners exploring spicy food.
Let’s order via the button below now!
Conclusion
Adding chili peppers to daily meals is a smart, flavorful way to actively protect cardiovascular health. Their key compound, capsaicin, works wonders by improving blood circulation, lowering cholesterol, and fighting the inflammation that triggers heart disease. You can easily reap these benefits without upsetting stomach by tossing fresh chilies into veggie stir-fries, sprinkling dried flakes over warm soups, or blending low-sodium homemade salsas. Ultimately, bringing a little heat to the kitchen is more than just a culinary choice—it is a powerful, proactive investment in heart’s longevity.


